About Us
Leathercraft is an ancient art that has been practised for centuries. In the Middle Ages Europeans carved geometric designs onto leather capes, boots and saddles. In America and Mexico leather workers carved leather in a floral style, depicting images of indigenous flowers such as roses and poppies onto leather products.
I am Kath Eastham, I started making guitar straps a few years ago as I found that what I was being asked for didn't seem to be offered by regular manufacturers. This led to requests from customers for other leather products including belts and bags. My designs are available from the website or from the craft fairs I attend, details of which will be posted in the News section. I take my inspiration from the hills of the Lake District, some of which are depicted on the leather goods, and sometimes from the leather itself. I particularly enjoy leather carving, as leather is a wonderful medium to work in, capable of being tooled to create beautiful three dimensional designs which will last for many years.
Here you will find information and photos detailing the creation of some of the products on this website.
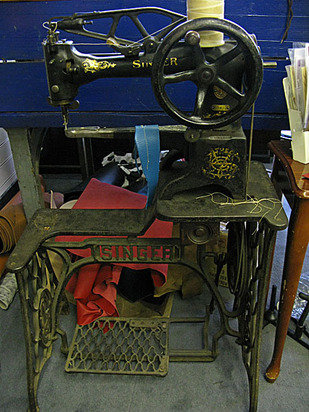
A 1904 Singer 29K15, known as "The Patcher". I use this for stitching some of the leather products on the website. The Patcher is traditionally a cobbler's machine as boots could fit easily over the long narrow arm. The head also rotates to allow stitching in any direction, even backwards if needed. The machine is operated by treadle or handcrank and so is completely carbon neutral!
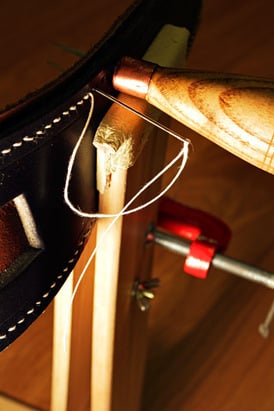
Handstitching a guitar strap using a diamond awl. The awl is used to punch a hole in the leather then two saddler's needles are used to stitch the pieces together. The pieces are held in place by a wooden frame called a stitching pony. This is a long slow process but rather theraputic!
Handcarving the belt using a ceramic swivel knife.
Dying a hand made leather belt.
Stitching the belt on a Singer 29k.
The Finished Belt.
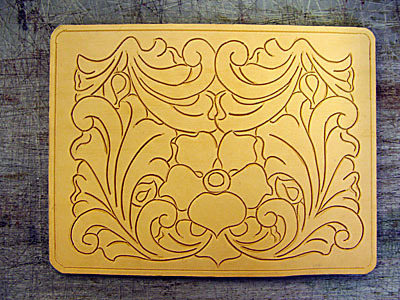
Hand tooled Leather belt pouch I'm making at the moment. This is just after I've cut the design into it, but before I've started tooling it. The background is not a Photoshop border, it's my plastic cutting board!
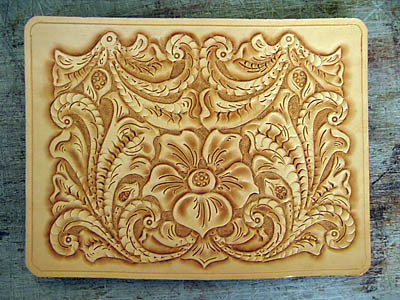
The pouch after tooling.
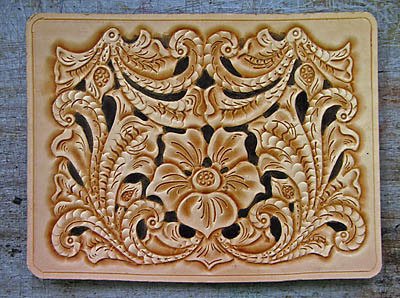
After tooling and dying the background.
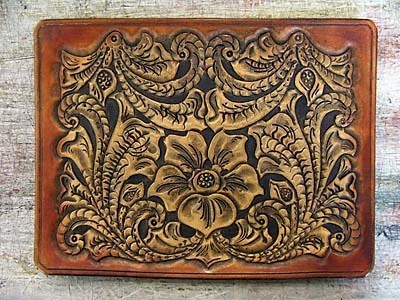
After dying the edge with a chestnut brown leather dye and applying an antique finish to it. The antique finish picks up the detailing of the tooling.
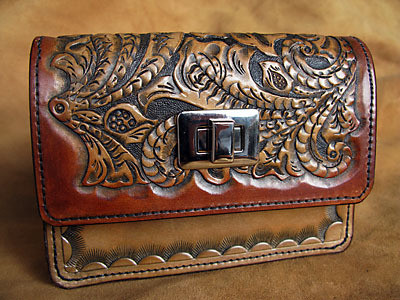
The Finished article after a coat of laquer and a polish!
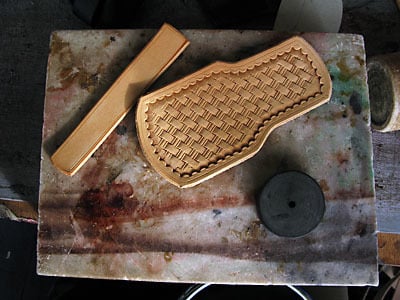
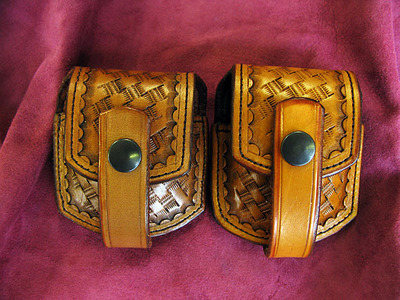
Making a pouch for a pocket watch, and the finished pouches. The one on the right is the chesnut one from the Shop page and has a slightly longer strap and so will hold a slightly bigger watch.